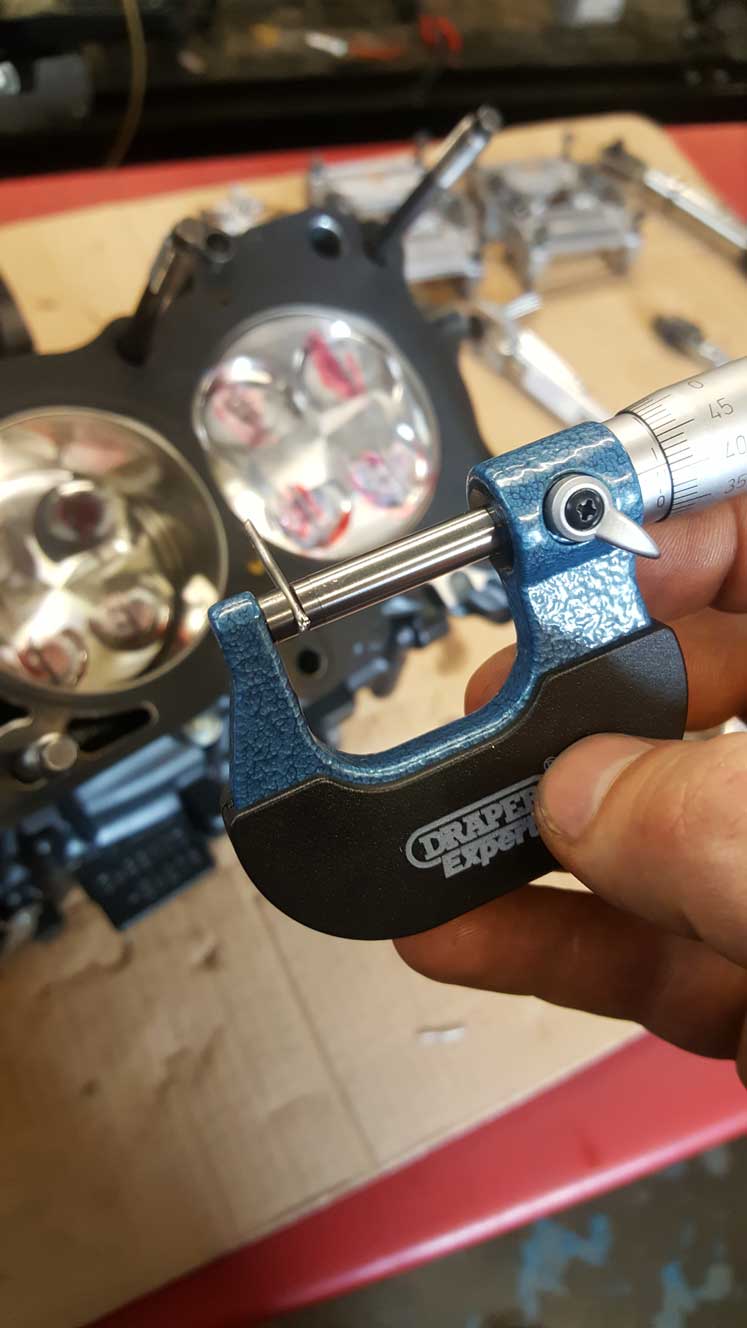
 With the bottom end all together and the head built, next up is the task of carefully measuring the squish, valve clearances, piston to valve clearances and dialling in the cam timing. First was to measure the squish. Suitable thickness pieces of plastiguage were placed on the top of each piston with a small bit of grease, one piece to the front and one to the rear of each piston, in the squish areas to account for the pistons rocking slightly. The head was then torqued down with a standard head gasket fitted, the engine was rotated one full rotation and the head was removed again. The plastiguage was carefully removed from the pistons and the thickness measured using a micrometer. The average of the front and rear pieces is the squish measurement. The squish was slightly off from where I wanted so a different thickness head gasket was selected accordingly and the same steps were repeated to check the squish was now correct.
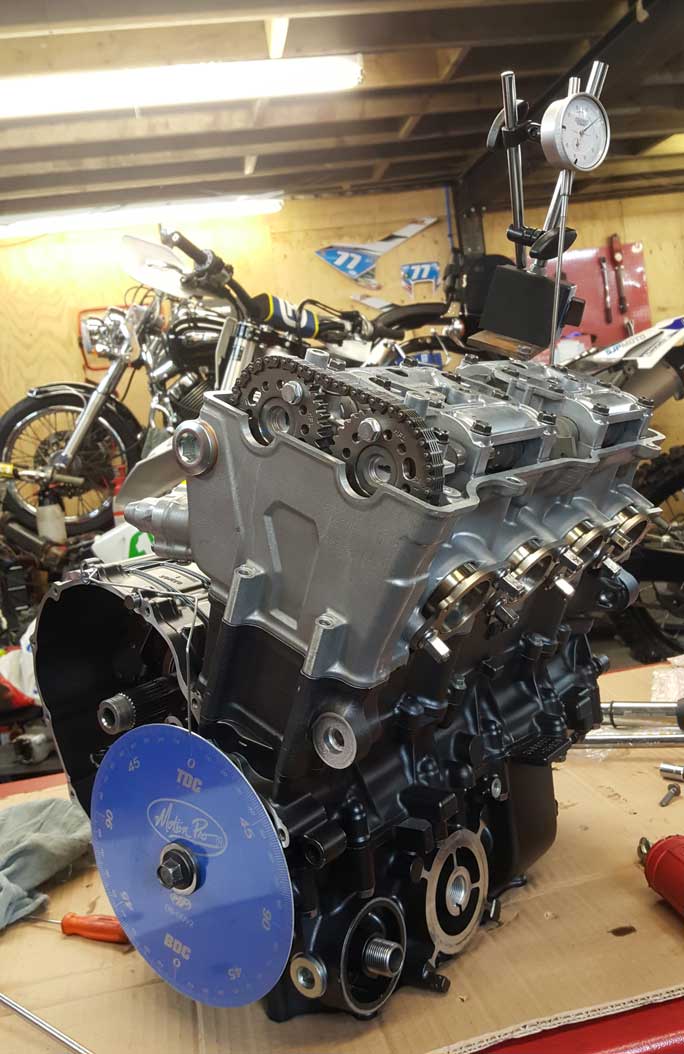
 With the head torqued back on again the cams were then fitted and valve clearances adjusted to the specified figures. Once these were ok it was time to set the cam timing with the adjustable cam wheels. A dial gauge was used to set the engine at top dead centre for cylinder 1 and a cam degree wheel was fitted to the crank with a pointer set to TDC. Each cam was installed with the adjustable wheels set in the middle of their adjustment and the dial gauge was set up on the top of an inlet valve bucket on cylinder 1. The engine was slowly rotated and the valve opening and closing degrees were recorded from the cam degree wheel. The cam wheels were adjusted and the measurements repeated until the cam timing matched the desired specification. The same was then repeated for the exhaust valve. Now the cam timing was sorted the valve to piston clearances could be checked. This was done by removing the head again, putting pieces of solder in each valve pocket on the pistons with a bit of grease, re assembling the head, rotating the engine once, stripping again and measuring the solder to check the clearance was a safe amount.
 With all clearances good and the valve timing set, the engine was ready to be completely assembled for the final time and fitted to the bike. The engine was run up to temperature and fluid levels checked a couple of times, all connections and bolts were double checked before heading off to the dyno. Being a new engine I was especially gentle mapping it on the dyno, concentrating on low rpm and small throttle openings for most of the time as this was also acting as running in the engine. High rpm and large throttle opening runs were kept to the minimum to get the fuelling perfect as I like to have the running in finished off on track for a couple of sessions of track day before letting it be thrashed. I’m sure you now all want to know the dyno result, well, it made a solid 178bhp at the wheel which is a decent figure for a 2008 CBR1000RR with this modest level of tuning. With a lovely straight power and torque curve too, the customer is more than happy and can’t wait to get it on track.


